
This tutorial takes you through Unformat Pro from installation to licence: typing the clipboard with ⌃⌥V where pasting is blocked, copying the selection or an area of the screen with ⌃⌥C, the history that retypes, Finder's hidden files, and then all the clipboard cleaning it inherits from Unformat.
- Mac, macOS 26 or later
- 15 chapters
- 14-day free trial
- Unformat Pro 1.2, October 2026
The screenshots show fictitious data: a history and a remote desktop window made up for the example (Lumière Studio Ltd, case CL-2026-0412), demo statistics, and a licence in its trial period, with no real key.
Contents (15 chapters)
Before you start
Unformat Pro is the full version of Unformat. Like Unformat, it strips the formatting from whatever you copy, and it adds four features that the Mac App Store doesn't accept, because they rely on macOS's Accessibility permission.
| Feature | Unformat (Mac App Store) | Unformat Pro |
|---|---|---|
| Clipboard cleaning, uppercase, lowercase, exclusions, ⌥⌘V | Yes | Yes |
| ⌃⌥C: text in an area of the screen | Yes | Yes |
| ⌃⌥C: selected text, copied directly | No | Yes |
| ⌃⌥V: type the clipboard where pasting is blocked | No | Yes |
| History: one click retypes the text | No (it copies it back to the clipboard) | Yes |
| Show or hide Finder's hidden files | No | Yes |
| Updates | Automatic, through the Mac App Store | Manual, from its page |
What you need
- A Mac running macOS 26 or later.
- Unformat Pro, downloaded from its page on apps.elpisia.com. You can try it free for 14 days; after that, you buy a licence from the ElpisIA shop (see Trial and licence).
There's no account to create. Your text stays on the Mac: Unformat Pro's only connection is for the licence, to activate it and then recheck it from time to time (see Your data).
This tutorial stands on its own. The Unformat tutorial also goes through every setting the two versions share in more detail.
Installing Unformat Pro
- On the Unformat Pro page, click “Download”: the file UnformatPro-1.2.dmg lands in your Downloads folder.
- Open it and drag Unformat Pro onto the Applications folder.
- Open Unformat Pro from the Applications folder. macOS reminds you that it was downloaded from the Internet: confirm that you want to open it. The app is notarised by Apple.
- A small green dot appears in the menu bar: Unformat Pro is active. The 14-day trial starts from this first launch.
Unformat Pro has no Dock icon: everything goes through this dot (an option on the General tab adds one). It opens in French the first time, whatever your Mac's language: to change the language, choose Preferences… and then the Interface tab (shown as “Paramètres…” and “Interface” while the app is in French).
If Unformat is open too
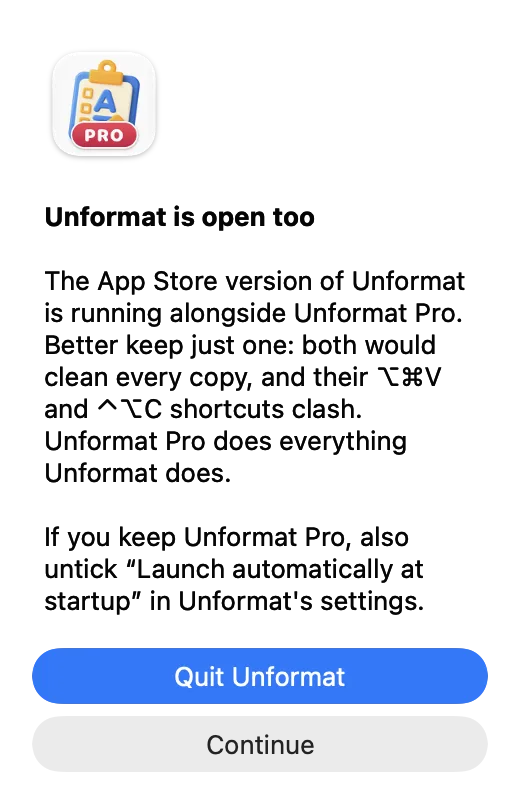
Unformat (the Mac App Store version) and Unformat Pro running together would clean every copy twice, and their ⌥⌘V and ⌃⌥C shortcuts would get in each other's way. Unformat Pro notices this, at launch or if Unformat opens later, and shows an alert titled Unformat is open too, once per launch:
- Quit Unformat: Unformat Pro quits it for you. The first time, macOS asks you to allow Unformat Pro to control Unformat: accept. If Unformat is still open five seconds later, an alert asks you to quit it from its menu bar icon;
- Continue: both stay open.
To keep only Unformat Pro, also untick Launch automatically at startup in Unformat's settings, or move Unformat to the Bin.
Unformat Pro doesn't pick up Unformat's settings or exclusions: set it up once (see Settings).
The Unformat Pro menu
Click the dot in the menu bar to open the menu. The Pro-only items are Show/Hide hidden files and Type clipboard.
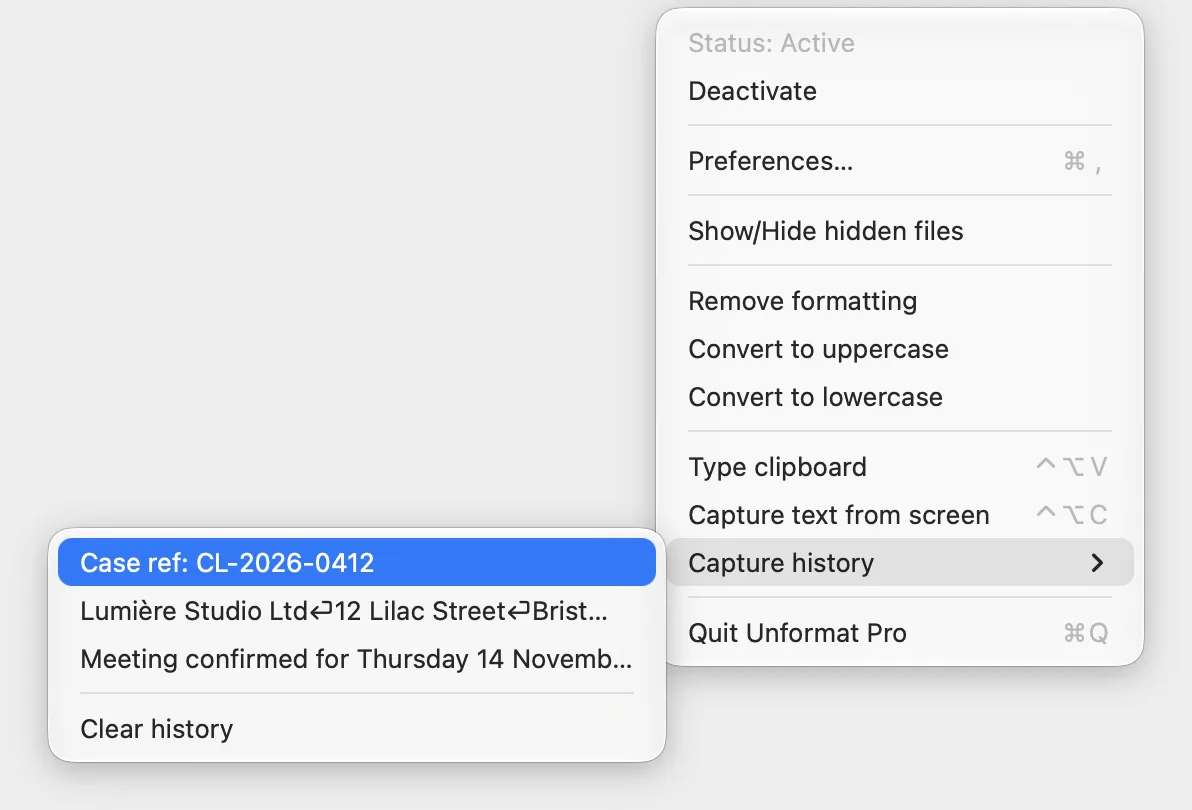
| Item | What it does |
|---|---|
| Status: Active or Status: Inactive | Shows whether cleaning is on (green or red dot). |
| Deactivate or Activate | Turns cleaning off or back on, like ⌥⌘V. |
| Preferences… ⌘, | Opens the Preferences window. |
| Show/Hide hidden files | Shows or hides Finder's hidden files (see Hidden files). |
| Remove formatting, Convert to uppercase, Convert to lowercase | The transformation modes (see Clipboard cleaning). |
| Type clipboard ⌃⌥V | Types the copied text, key by key (see ⌃⌥V). |
| Capture text from screen ⌃⌥C | Copies the selection or, failing that, the text in an area (see ⌃⌥C). |
| Capture history | The last ten texts; click one to retype it (see The history). |
| Quit Unformat Pro ⌘Q | Quits Unformat Pro. |
Typing the clipboard (⌃⌥V)
Citrix, a remote desktop or a website that refuses pasting: Unformat Pro gets your text in by typing it character by character, just as you would at the keyboard. The app on the receiving end doesn't see a paste, so its paste block doesn't apply.
- Copy the text on your Mac.
- Click in the target field, in the remote session or on the page.
- Press ⌃⌥V: typing starts straight away.
- To stop it partway through, press Esc: a Typing stopped notification confirms it (the Esc key press also reaches the receiving app).
Line breaks are typed with the Return key, tabs with the Tab key. Each character is typed with the key that produces it on the Mac's keyboard, and the remote session reads those keys with its own layout: choose the same keyboard layout on the Mac and in the session, otherwise letters and digits get swapped (a and q, z and w…). Characters that aren't on the Mac's keyboard or that need a dead key (ô, ê, ë… on a French keyboard), as well as emoji, are sent another way and may not arrive in a remote session.
Speed and delay
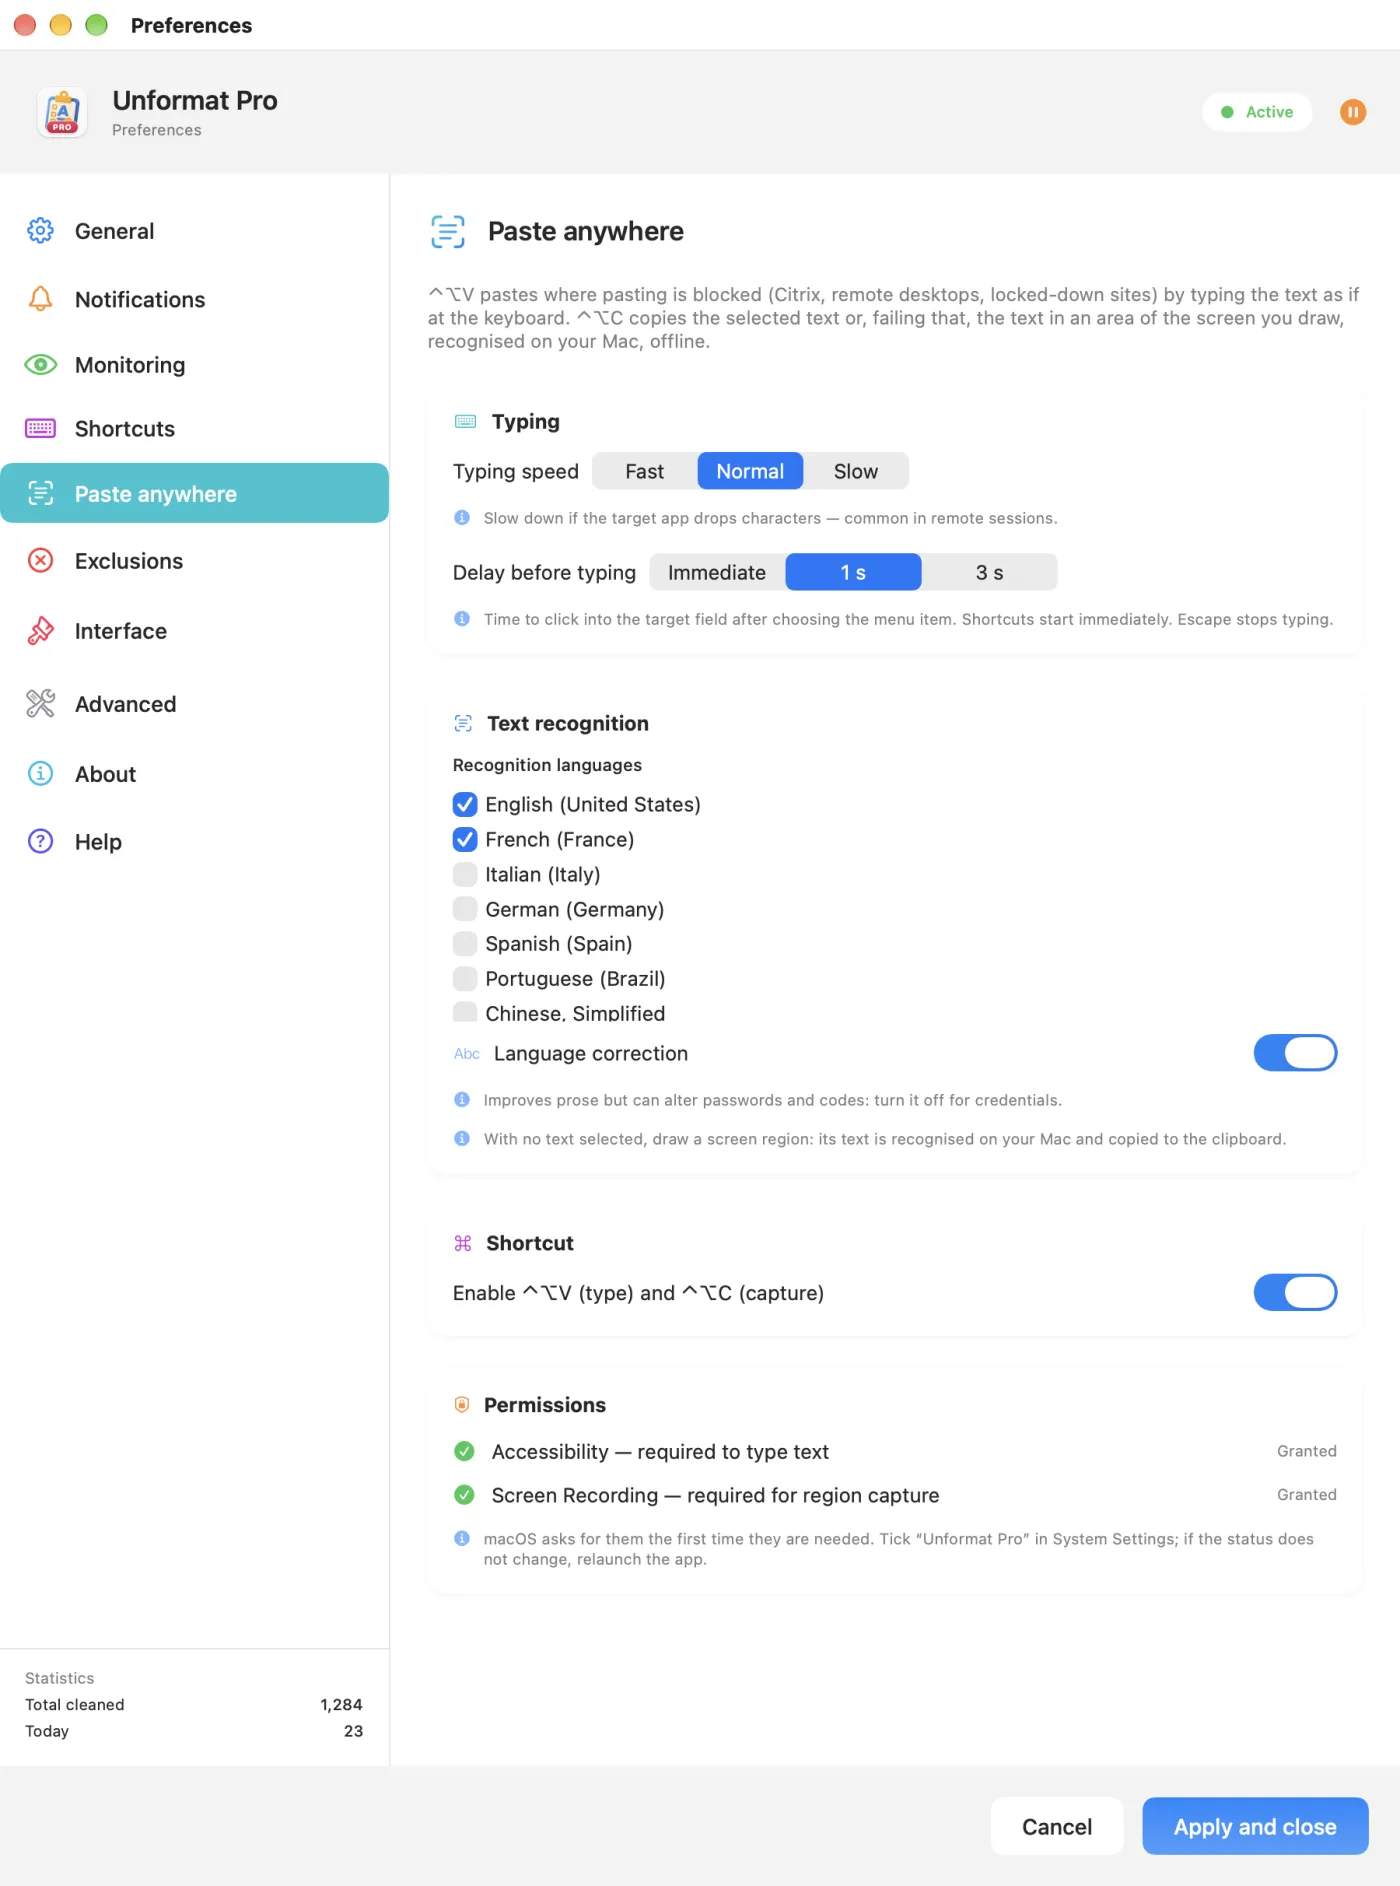
In Preferences…, on the Paste anywhere tab, in the Typing group:
- Typing speed: Fast, Normal (the default) or Slow. Switch to Slow if characters go missing, which often happens with remote sessions.
- Delay before typing: Immediate, 1 s (the default) or 3 s. It applies when you use the Type clipboard menu item or the history, giving you time to click in the right field. The ⌃⌥V shortcut, by contrast, always starts straight away.
Messages you may see
The first two appear as notifications, if notifications are on; the third is an alert.
- Nothing to type: the clipboard doesn't contain any text.
- Already typing: earlier typing hasn't finished yet; wait, or stop it with Esc.
- Accessibility permission required: see Permissions.
Some organisations block pasting in their remote desktops on purpose: check that input typed in this way is allowed. Always check a username, a code or an amount before submitting it.
⌃⌥C: copying the selection or an area
With Unformat Pro, ⌃⌥C first checks whether any text is selected in the frontmost app. If there is, it copies it directly; if not, it switches to the area selector.
With a selection
- Select some text in an app.
- Press ⌃⌥C (or choose Capture text from screen from the menu).
- The text is now on the clipboard and in the history; if notifications are on, a Copied notification shows how it begins.
Reading the selection requires the Accessibility permission. Without it, or if the app doesn't hand over its selection (a Citrix session is just an image), ⌃⌥C goes straight to the area selector.
Without a selection: an area of the screen
- The screen darkens and the prompt Drag to frame the text to copy · Esc to cancel appears.
- Drag to draw a rectangle around the text, then let go: the text is recognised on the Mac and copied.
- Esc or a right-click cancels; a single click without dragging is ignored.
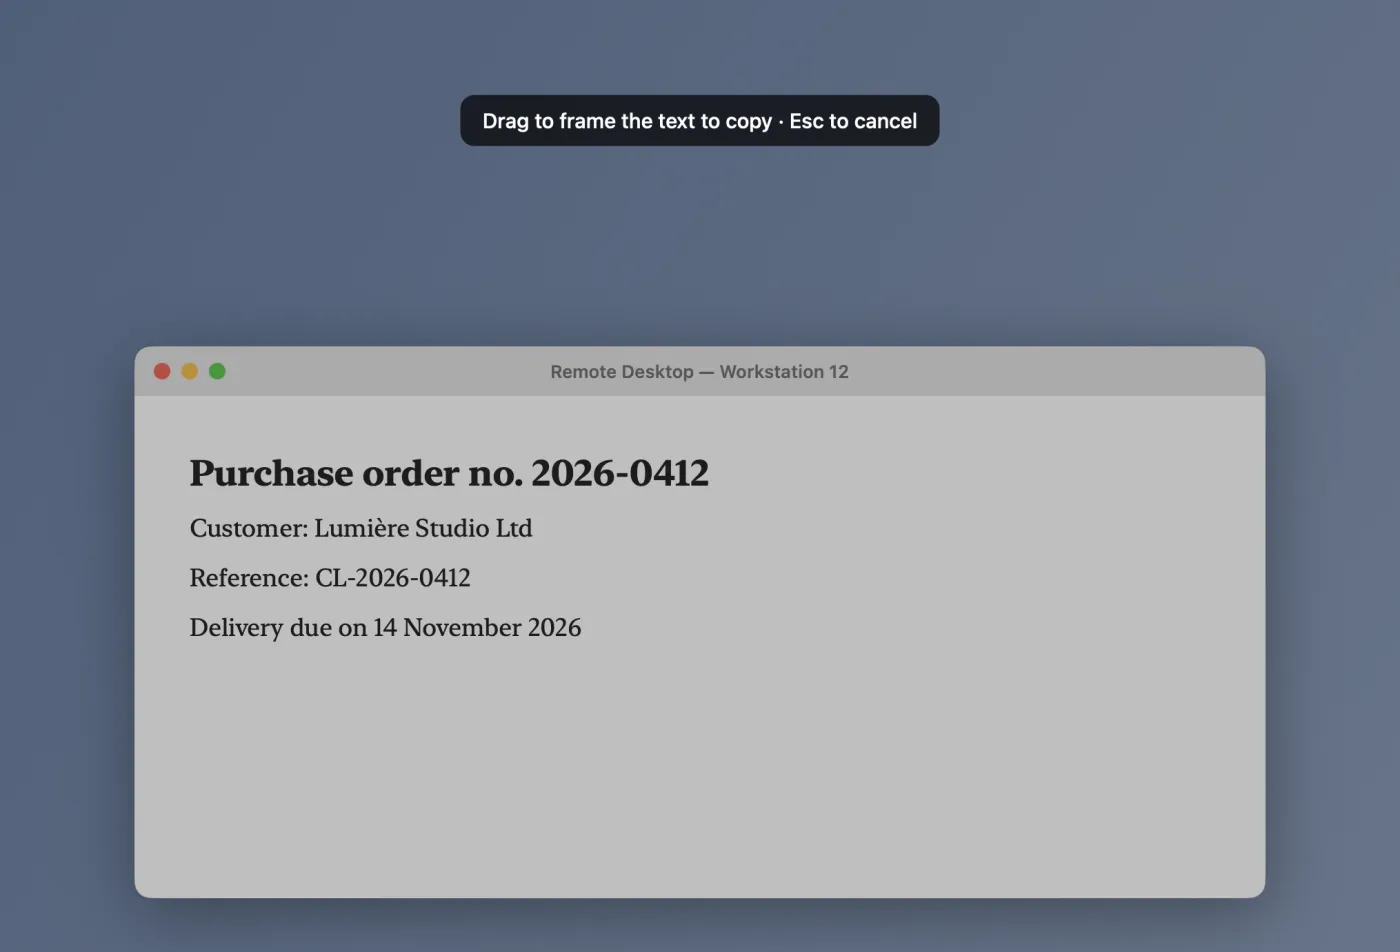
Capturing an area requires the Screen Recording permission (its status is on the Paste anywhere tab, in the Permissions group); text reading is set up in the Text recognition group (see Text recognition). Right after installation, the very first recognition can take about a minute.
As long as some text is selected, ⌃⌥C copies it and doesn't offer the area: to capture an area, first click somewhere else to deselect.
Retyping from the history
The Capture history submenu keeps the last ten texts that went through the clipboard, whether copied normally or captured with ⌃⌥C. In Unformat Pro, clicking one of them types it into the frontmost app.
- Click in the field where the text should go.
- Open the Unformat Pro menu, go to Capture history and choose the text.
- Typing starts after the Delay before typing you set (1 second by default), at the Typing speed you chose. Esc stops it.
- Each line shows the first 40 characters (“⏎” stands for a line break); hover over it to read the full text.
- Clear history empties it; when it's empty, it shows Nothing captured yet.
- The history is kept in memory, never on disk, and disappears when you quit Unformat Pro. Passwords that a password manager marks as confidential never go into it.
Without a licence, once the trial is over, clicking puts the text back on the clipboard instead of typing it.
Showing or hiding hidden files
Finder's hidden files and folders (the ones whose names start with a full stop, the Library folder…) can be shown or hidden with a single click.
- In the Unformat Pro menu, choose Show/Hide hidden files.
- Unformat Pro switches to Finder and sends it its ⇧⌘. shortcut: the hidden items appear, greyed out.
- Choose the same item again to hide them.
The shortcut is sent using the full-stop key of your keyboard layout, so it also works with “French – Numerical”, where the full stop sits on a different key from English layouts. This feature requires the Accessibility permission; without it, a Permission required alert takes you to the settings.
Back to contentsPermissions
Clipboard cleaning doesn't need any permission (macOS simply offers to show notifications, the first time a copy is cleaned). The other permissions are requested the first time you use the feature that needs them.
| Permission | For | Where to grant it |
|---|---|---|
| Accessibility | ⌃⌥V, reading the selection with ⌃⌥C, retyping from the history, hidden files | System Settings › Privacy & Security › Accessibility (on macOS 27: “Device Control and Data Access”) |
| Screen Recording | Capturing an area with ⌃⌥C | System Settings › Privacy & Security, screen recording section (on macOS 27: “Screen & System Audio Recording”) |
| Automation | Quitting Unformat from the alert shown when both versions are open | Requested once, when you click Quit Unformat |
| Notifications | Confirmations (Copied, Clipboard cleaned…), optional | System Settings › Notifications |
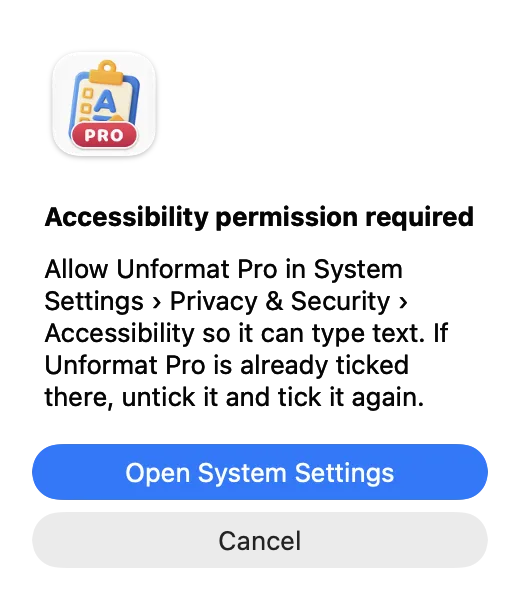
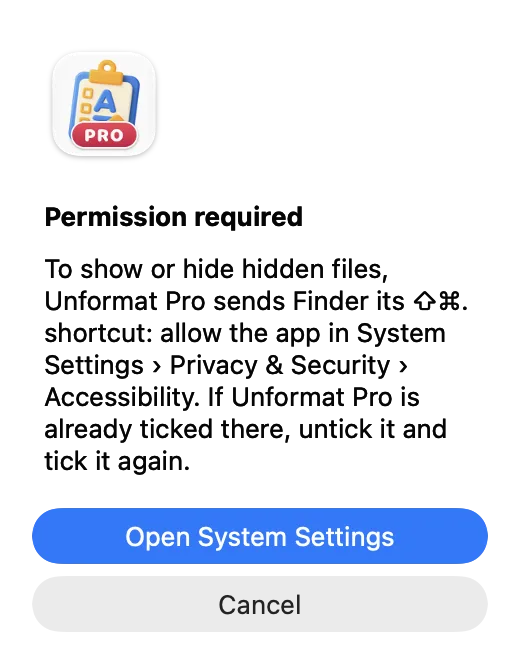
The Paste anywhere tab, in its Permissions group, shows the status of the first two: Accessibility — required to type text and Screen Recording — required for region capture, each either Granted or Denied, with an Open System Settings button for as long as it's denied.
Unformat Pro is ticked in System Settings but nothing happens? Untick it, tick it again, and relaunch Unformat Pro if the status doesn't change.
Clipboard cleaning
While the dot is green, Unformat Pro checks the clipboard every second (the interval can be changed). When a new copy carries RTF or HTML formatting, it replaces it with plain text: paste, and only the text arrives.
What is never touched
- files and folders copied in Finder, and links;
- an image copied on its own;
- passwords copied from a password manager that marks them as confidential;
- anything you copy in an excluded app.
Anything copied while cleaning was off isn't cleaned after the fact. Each cleaned copy is confirmed by a green Copied badge, a sound and a notification (Notifications tab).
The menu modes
- Convert to uppercase or Convert to lowercase (ticking one unticks the other): every text copy changes case, with or without formatting.
- Remove formatting: only useful with a case mode, to also remove the formatting from text that's already in the right case. Without a case mode, formatting is always removed.
⌥⌘V: turning cleaning off and on
⌥⌘V toggles cleaning from any app: turn it off to keep some formatting, then turn it back on. While this shortcut is enabled, it takes over ⌥⌘V from other apps (“Move Item Here” in Finder): you can turn it off on the Shortcuts tab, with the Enable ⌥⌘V shortcut switch.
Excluding apps
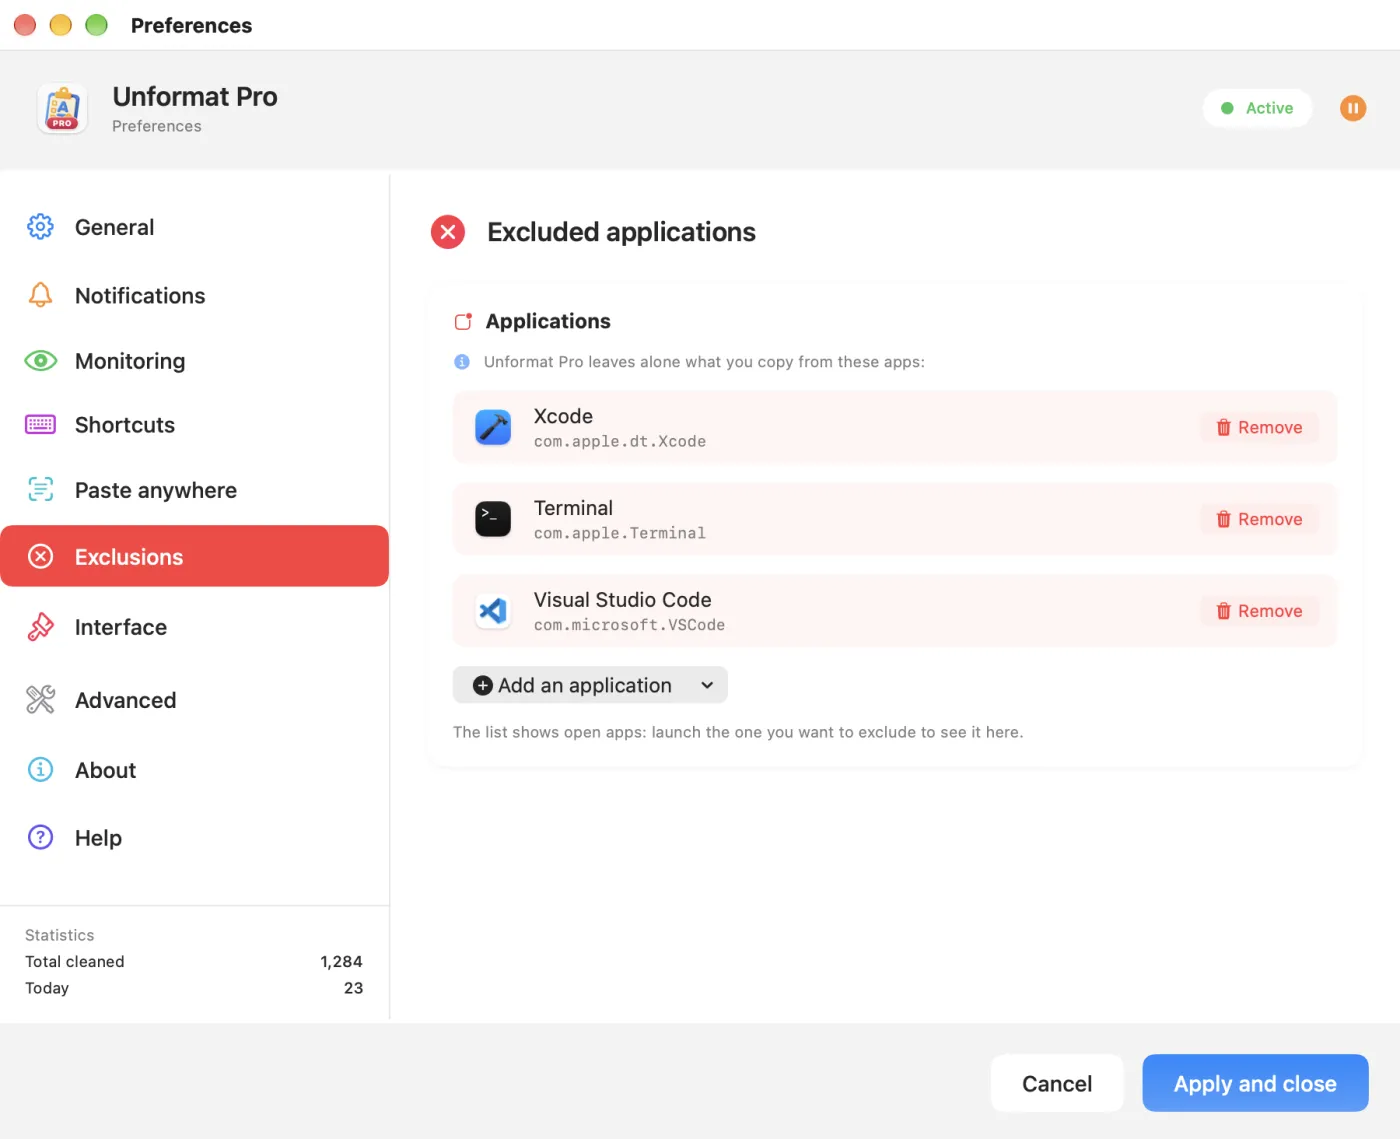
- Open the app you want to exclude (the list only offers open apps).
- Preferences…, Exclusions tab, Add an application, then choose it.
Whatever you copy in that app keeps its formatting. Remove takes an app off the list. Xcode, Terminal and Visual Studio Code are excluded by default.
Back to contentsText recognition
The Text recognition group on the Paste anywhere tab sets how ⌃⌥C reads an area of the screen.
- Recognition languages: tick the languages of the text you capture; ticked languages move to the top of the list (French and English to begin with). At least one always stays ticked.
- Language correction (on to begin with): improves ordinary text, but can change a password, a code or a reference. Turn it off for credentials.
- In the Shortcut group, Enable ⌃⌥V (type) and ⌃⌥C (capture): a single switch for both shortcuts; the menu items stay available.
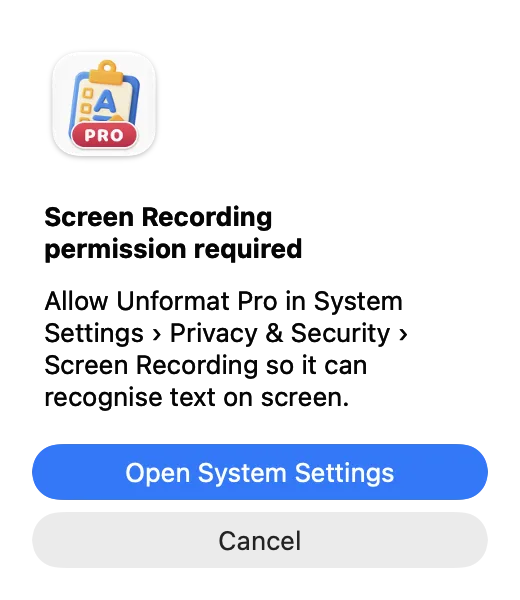
The first time you press ⌃⌥C with nothing selected, macOS asks for the Screen Recording permission and Unformat Pro shows the alert Screen Recording permission required. Click Open System Settings, turn Unformat Pro on, then quit and reopen it if the status doesn't change.
Reading follows the lines from top to bottom: for text laid out in two columns, frame one column at a time. Always check a captured code or amount.
Settings
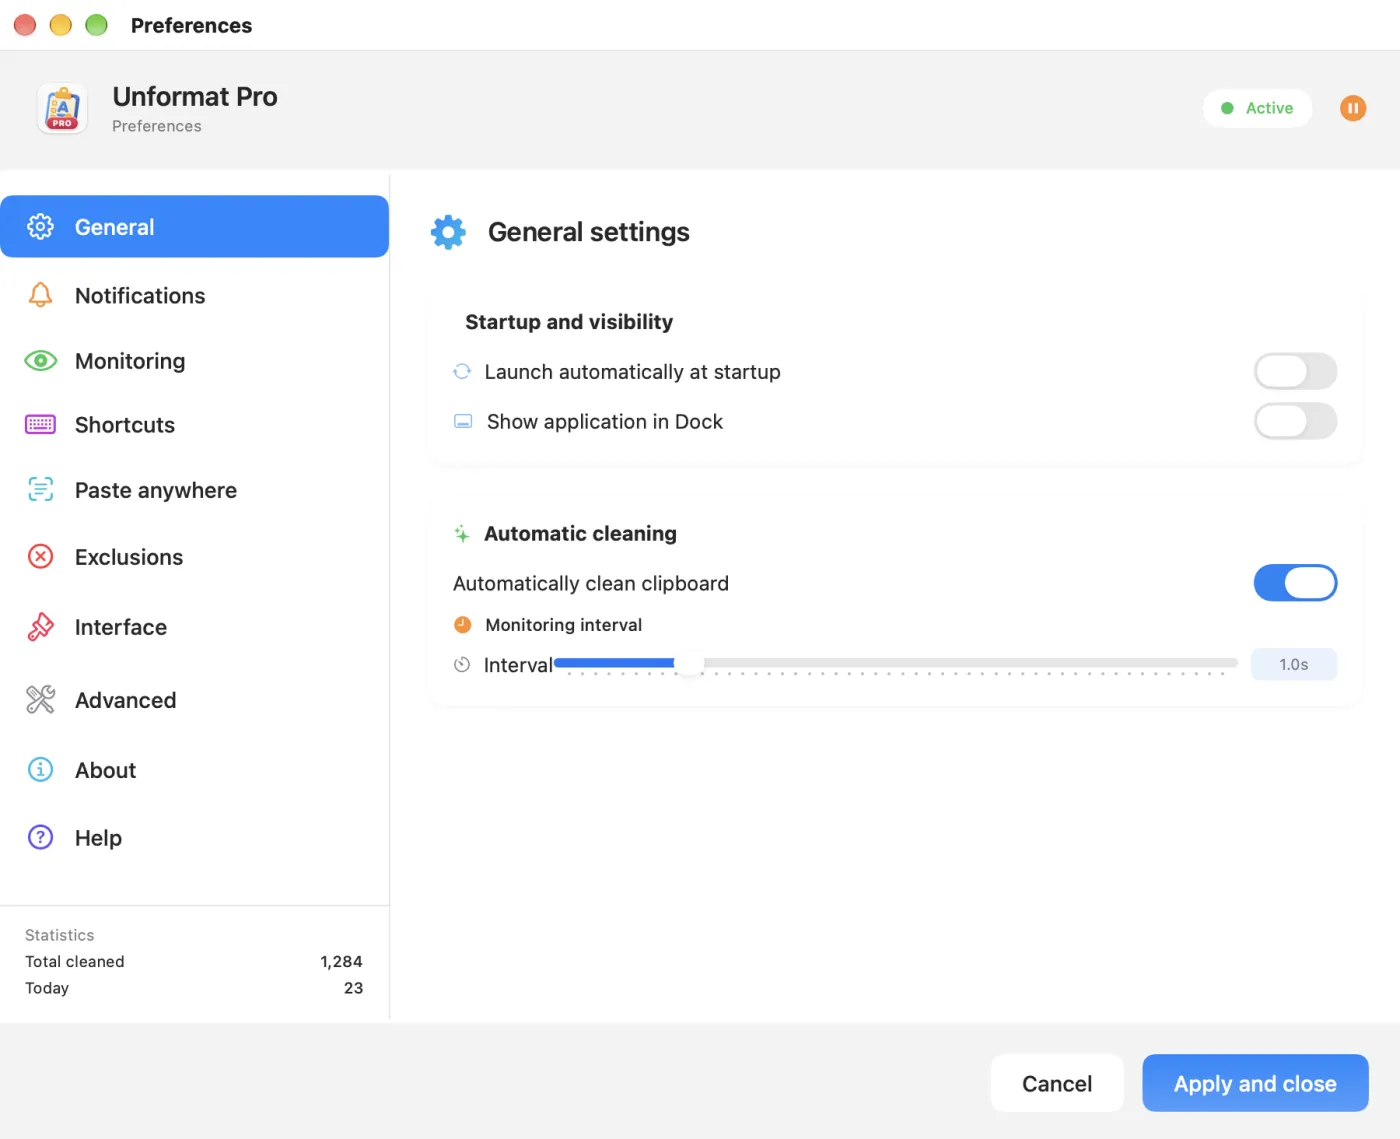
Preferences… opens Unformat Pro's Preferences window. Its settings belong to Unformat Pro alone: Unformat's aren't carried over.
| Tab | What you set there |
|---|---|
| General | Launch automatically at startup, Show application in Dock, Automatically clean clipboard, Monitoring interval (0.1 to 5 s, 1 s by default) |
| Notifications | The Clipboard cleaned notification and its sound, the Copied badge (in the centre, at the top or at the bottom of the screen), the confirmation sound and its volume |
| Monitoring | Clean RTF formatting, Clean HTML formatting, Trim spaces and line breaks at the start and end |
| Shortcuts | Enable ⌥⌘V shortcut |
| Paste anywhere | ⌃⌥V typing, text recognition, the ⌃⌥V and ⌃⌥C shortcuts, permissions |
| Exclusions | The apps whose copies aren't cleaned |
| Interface | Show tooltips, the window's Appearance theme, Language (French, English, Spanish, German) |
| Advanced | Statistics: Total cleaned and Today, reset monthly or straight away |
| About | Version, licence, updates |
| Help | A summary of how it works, and troubleshooting |
Settings on the General tab only take effect once you click Apply and close; Cancel, or closing the window, discards them. The other tabs apply as soon as you click. If you turn cleaning off or on with the window open (the round button at the top right, or ⌥⌘V), close the window afterwards with Cancel: Apply and close would put cleaning back the way it was when the window opened.
Trial and licence
You can try Unformat Pro free for 14 days, with every feature included, starting from the first launch. After that, a lifetime licence, valid on two Macs, keeps the Pro features.
How much of the trial is left?
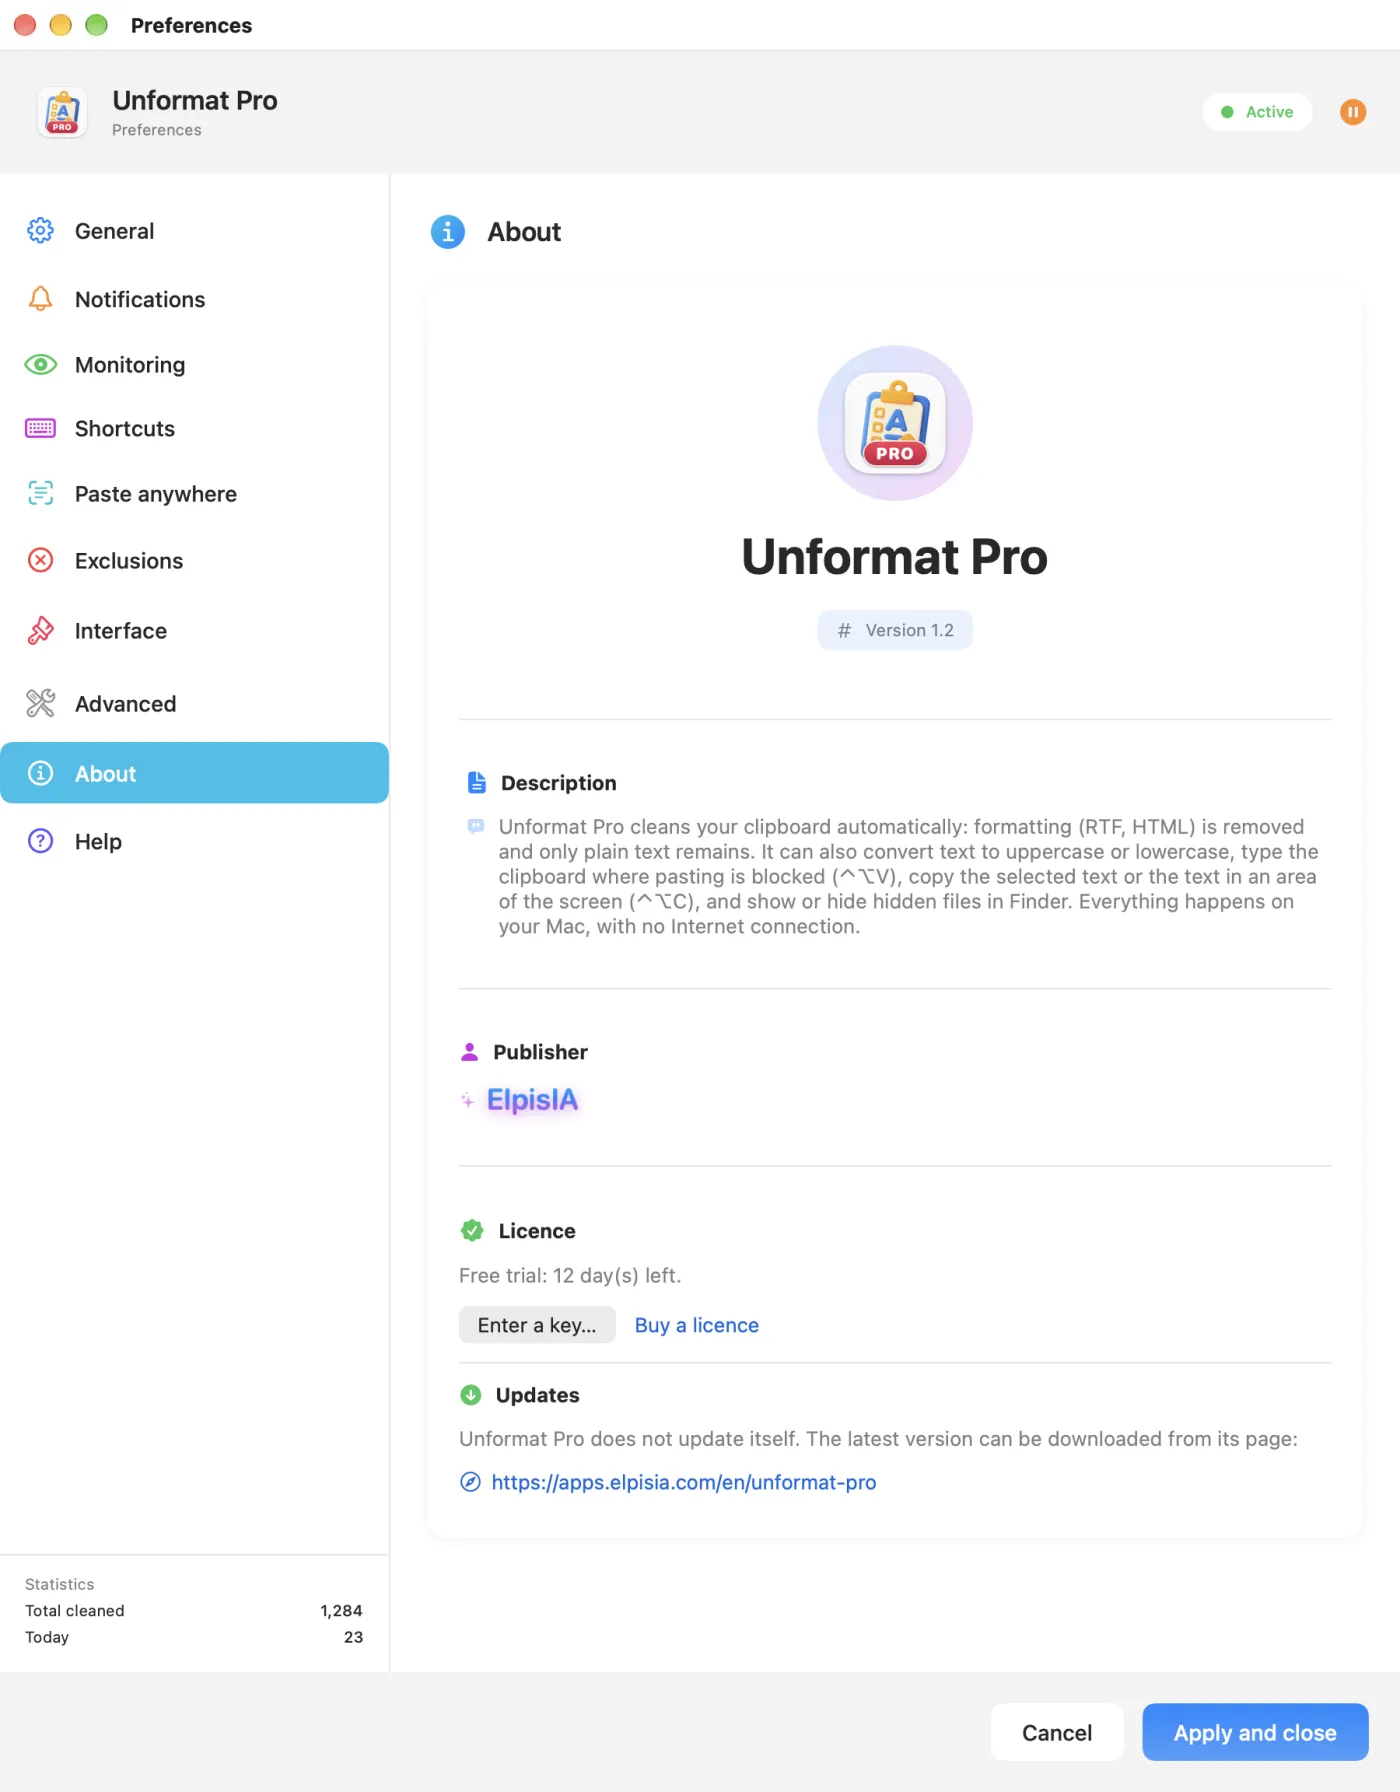
In Preferences…, on the About tab, the Licence section shows, for example, “Free trial: 12 day(s) left.” With a licence, the line changes to “Licence activated on this Mac”, followed by the number of Macs in use.
Activating a licence
- Buy a licence from the ElpisIA shop: the Buy a licence link opens its product page in your language. The key arrives by email.
- On the About tab, click Enter a key…: the Unformat Pro licence window opens.
- Paste the key into the field, where the greyed-out example UFPR-XXXXX-XXXXX-XXXXX-XXXXX shows what it looks like.
- Click Activate (or press Return). Your Mac must be connected to the Internet for this step.
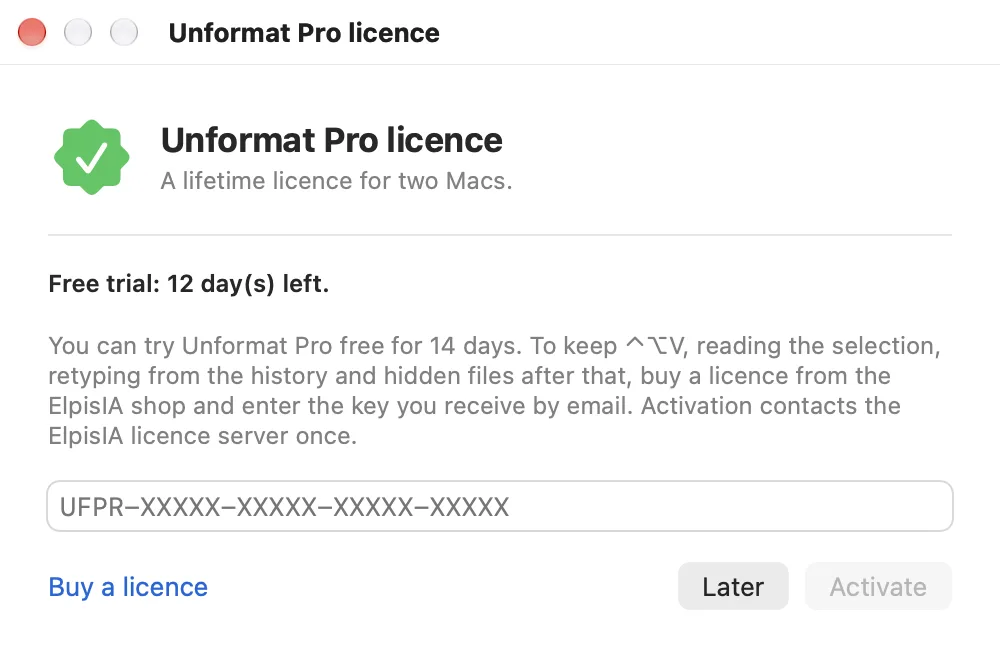
When activation succeeds, the window closes and the About tab shows, for example, “Licence activated on this Mac (1 of 2 Macs).” Later closes the window without changing anything; if you reopen it with an active licence, it offers Close instead. On your second Mac, enter the same key.
If activation fails
| Message | What to do |
|---|---|
| Unknown key, or the licence server could not be reached. Check the key and your Internet connection. | Copy the key again from the email (with no extra spaces) and check your connection. |
| This key is already activated on the maximum number of Macs. | The key is already in use on two Macs: write to us using the form below. |
| This Mac is no longer registered for this key: please enter it again. | Enter the key one more time. |
| This key does not unlock Unformat Pro. | It's the key for another product: check the email you received. |
| This licence has been deactivated. or This licence has expired. | Write to us. |
| A macOS message about the Internet connection | The Mac couldn't reach the licence server: check your connection and try again. |
After the trial, without a licence
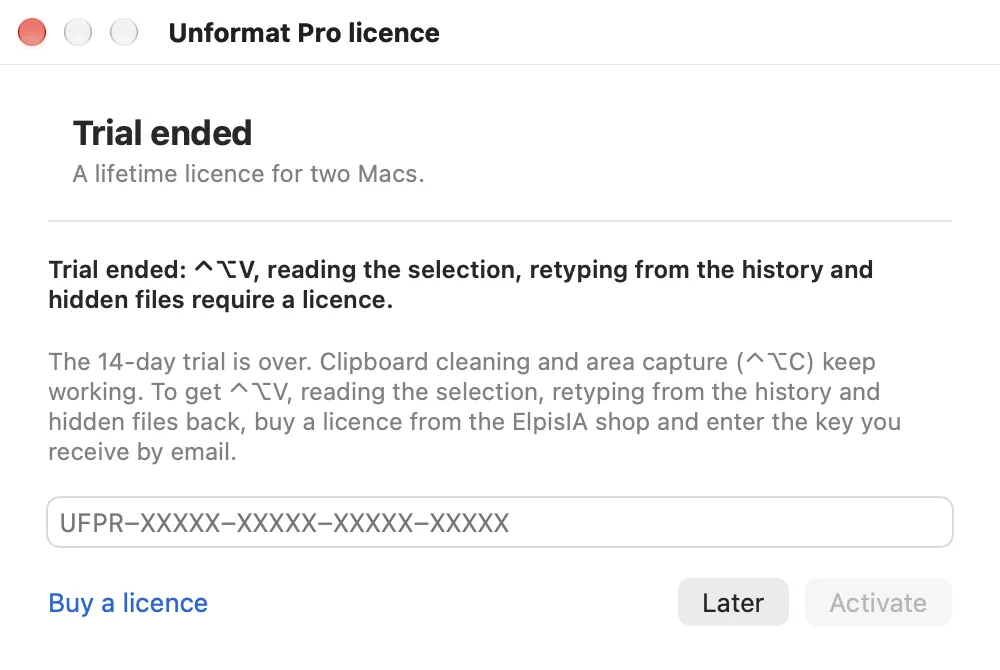
The first time you open Unformat Pro after the trial ends, the licence window opens once, with the heading Trial ended. The rest of Unformat Pro carries on working:
- still working: clipboard cleaning, the modes, ⌥⌘V, exclusions and capturing an area with ⌃⌥C;
- need the licence: ⌃⌥V and hidden files (the licence window opens instead), reading the selection with ⌃⌥C (area capture takes over) and retyping from the history (the text is copied back to the clipboard instead).
Updating or uninstalling
Unformat Pro doesn't update itself and never checks for updates online. The latest version is always on its page.
- On the About tab, note the version, then click the link in the Updates section: it opens the Unformat Pro page in your language.
- If the page offers a newer version, download the new .dmg file.
- Quit Unformat Pro (Quit Unformat Pro), then drag the new version onto the Applications folder, replacing the old one.
Your settings and licence aren't stored inside the app, so they survive the replacement.
Uninstalling
First untick Launch automatically at startup if you turned it on, then quit Unformat Pro and move it to the Bin. Its settings remain in macOS's preferences, and its licence and trial date in the keychain, so reinstalling doesn't restart the trial. Unformat Pro has no account; its “Account Deletion” page explains how to erase these settings.
Back to contentsYour data
- Your text never leaves the Mac. Unformat Pro never sends anything you copy, type or capture; text recognition happens on the Mac.
- A single connection, to the ElpisIA licence server: to activate the key, then to recheck it in the background when the stored licence token expires, at most once a day. It sends the key, the product and a fingerprint of the Mac: a hashed hardware identifier, never its name. Without a connection, Unformat Pro keeps working with the licence already activated; if the server replies that the licence has been deactivated, has expired or is unknown, it is removed from this Mac.
- What is stored: your settings, the counters, the licence key and a copy of the trial date in macOS's preferences; the trial date and the licence token in the keychain. The history stays in memory.
Troubleshooting
⌃⌥V types nothing, or types gibberish
- Check the Accessibility permission on the Paste anywhere tab; if Unformat Pro is ticked in System Settings but nothing happens, untick it and tick it again.
- Click in the target field first: typing goes to the frontmost app.
- Characters go missing in a remote session: set Typing speed to Slow.
- Has the trial ended? The licence window opens instead of typing (see Trial and licence).
A copy keeps its formatting
- The menu should show Status: Active, and the app you're copying from mustn't be in Exclusions.
- On the Monitoring tab, is the format switched on (Clean RTF formatting, Clean HTML formatting)?
- Did you paste less than a second after copying? Give Unformat Pro a second, or shorten the Monitoring interval.
Formatting disappears even though cleaning is off
Unformat (the Mac App Store version) is probably open too and cleaning on its own: quit it (see If Unformat is open too).
⌃⌥C does nothing
- To capture an area, the Screen Recording permission must be Granted (Paste anywhere tab); quit and reopen Unformat Pro after granting it.
- The very first recognition after installation can take about a minute.
- Is the shortcut enabled (Enable ⌃⌥V (type) and ⌃⌥C (capture))? Unformat, if it's open at the same time, may be grabbing it too.
Still have a question? See the FAQ or write to us using the form below.
Back to contents